How To Get Water Out Of Kayak In 3 Easy Steps
Have you ever wondered how to get water out of your kayak?
Say you’re enjoying your kayak session in the middle of a lake, suddenly, you start to feel wetness in your feet. As you look down, your worst nightmare emerges right in front of you.
“OH NO!”
You have to act quickly or you will risk sinking together with your kayak.
DISCLOSURE: The links on this page may be affiliate links, from which I earn a small commission if you click on them, AT NO EXTRA COST to you. I hope you find the information here useful. Thanks!
So, How Do You Get Water Out Of A Kayak?
Ideally, you should bring these items for your kayaking sessions as these are the perfect tools to help remove water out of your kayak:


Additionally, there are several methods to remove water from a kayak. However, these methods may work differently based on the type of kayak you use.
More importantly, you must familiarise yourself with your kayak’s drainage system and bring the right tools to prevent water from entering your kayak.
Related Posts:
- Kayaking For Beginners -All You Need To Know
- How To Get Out Of A Kayak With Bad Knees?
- Do Kayaks Tip-Over Easily?
- Bioluminescence Kayaking: 7 Best Places in the World!
Why You Need To Remove Water Out Of Your Kayak
You need to know how to get water from a kayak unless you’re planning to get yourself wet on that day and swim together with the fish.
If that’s not on the agenda, you should keep reading this article as I share detailed tips on how to solve this problem.
Sure, it can be stressful and daunting if you came unprepared and did not bring any self-rescuing tools when caught in such situations as capsized kayaks.
How To Drain Water Out Of A Kayak
Here in this section, I will share these super easy steps on how to get water out of your kayak!
Step 1: Execution Methods
So, here are some best ways to get water out of kayak;
- If You Are With A Kayak Partner
Get their attention as quickly as you can!
Especially when you’ve realized that there’s a massive leakage in your kayak and your kayak begins to sink fast.
Try calling out your kayak partner by their name or by using a whistle or bang your paddle loudly so that people near you are aware that you require help!
- If You Are Alone
Grab those portable, lightweight bilge pumps and start pumping out water from the kayak.
Bear in mind that using a bilge pump can be physically exhausting as you constantly have to pump out of water.
Alternative option: use a collapsible bucket if you have one! It’s cheaper, easier and faster to remove water!
Step 2: Bring The Right Tools
If you have inspected your kayak thoroughly before your kayak session, then I strongly recommend that you also bring these tools as they will help with water removal:
Plus, it’s always good to be prepared for any worst-case scenarios.
Step 3: Pay Attention!
It does sound simple, but honestly, many people tend to overlook this habit.
By the time they’ve realized that there’s water in their kayak, it would’ve been a bit too late, especially if one is already at an open water area (i.e., lake, sea), which can cause danger (especially if you are on your own and with little experience)
So a good tip is to observe and inspect your kayak first before starting your kayak session.
Generally, if there’s water inside the hull of the kayak, you likely have leakage in your kayak.
If you want to know more on how to find a ‘potential leakage spot’ on your kayak and how to keep water out of your kayak, keep reading as I’ll share more details on this too.
Now, let’s take a look at how to remove water based on the types of kayaks used;
How To Remove Water Based On Types of Kayaks:
1. How To Remove Water Out Of Sit-On-Top kayak
If you plan to get or have a sit-on-top kayak, here’s what you need to know about its water drainage system.
Sit-On-Top Kayak has scupper holes, which are built-in holes designed to drain any water that may get onto the deck.
But if there’s more water entering onto the deck, it can significantly sink your kayak, so here’s how you can tackle this problem and remove water quickly:
- By using a collapsible bucket
- By using portable, lightweight bilge pumps
2. How To Remove Water Out Of A Sit-In Kayak

If you plan to get or have a sit-in kayak, then you should know that it does not have a drainage system like scupper holes. Instead, you need to get yourself a kayak spray skirt.
Removing water from sit-in Kayak can be more challenging as you are limited by a small space.
But if you do get caught in such circumstances, here’s what you can do to remove water from your sit-in kayak:
- By flipping over your sit-in kayak (if you are near land)
- By using portable, lightweight bilge pumps
Generally, it’s harder to get water in a sit-in kayak, especially if you wear a fitted kayak spray skirt. (It usually costs between $20 and $100)

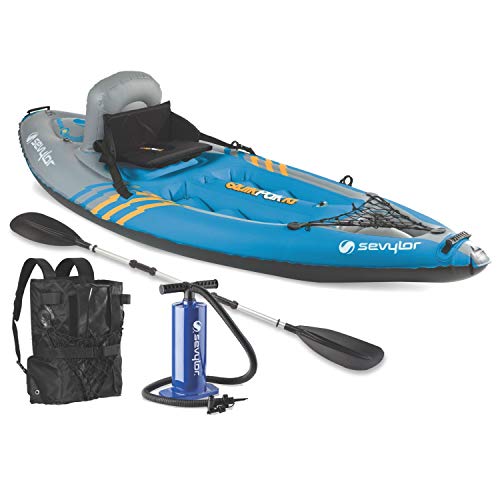
3. How To Get Water Out Of An Inflatable Kayak
An inflatable kayak is relatively easy to manage, but if you do catch yourself having water in your inflatable kayak, here are several options you can try:
- By flipping over your inflatable kayak & drying it out
- By draining water through the drain plug
- By using portable, lightweight bilge pumps
- By using a portable wet/dry vacuum cleaner ( though it’s pretty bulky)
If you take care of your inflatable kayak properly, you’ll be surprised that an inflatable kayak can last even up to 10 years.
4. How To Get Water Out Of Pelican Kayak
Pelican Kayak is a famous water sports brand amongst beginner and experienced kayakers.
They are very popular because they produce a variety of affordably priced kayaks with specially patented RAM-X multi-layered material. This material is unique and robust because it allows Pelican Kayaks to retain its shape when in contact with strong impact.
Nonetheless, accidents can still happen. So if you have to face such incidents where you need to get water out from your pelican kayak, just make sure to have at least one of these items:
How To Keep Water Out Of Your Kayak

Let’s learn how to prevent water from entering your kayak.
How To Spot Any Leakage At Your Kayak
When it comes to leakage, you have to perform several tests before your kayak session to identify the exact location of the leakage.
First, you have to inflate your kayak. Once it is inflated, it’s time to perform the following test:
- Listening Test: Find a quiet place and try to hear any hissing sounds or any other odd sounds coming out from your kayak.
- Dry Test: Try to thoroughly inspect your kayak starting from the tip of your kayak and gradually scan through all surface areas. You can even start inspecting your kayak using a grid-based section so that you can examine it in detail.
Tip: Give more attention to areas near the scupper holes as it is one of the most common spots for leakages.
- Water Test: If there are no signs of leakage from your dry test, then place your kayak in a calm water area and observe for any signs of air bubbles near your kayak.
Tip: You can submerge yourself in the water and inspect the underneath of your kayak’s hull as this will allow you to see any air leaks in detail.
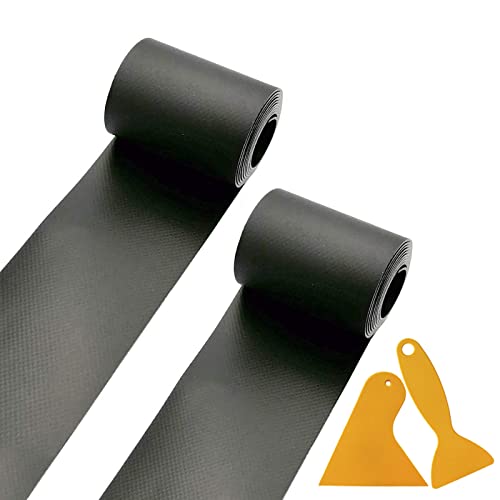
Once you have performed these 3 tests and successfully identified the leakage spot in your kayak. Then I highly recommend that you quickly cover the leakage spot using a temporary adhesive patch.
Types of Kayak Damage

Let’s now take a look at the various types of damage that can affect your kayak, and the best ways to fix them!
COMMON ‘COSMETIC’ DAMAGE ON YOUR KAYAK
These kinds of damage may not affect the functionality of your kayak, but they may tarnish your kayak’s appearance with a wear & tear look.
- Scratches/ Cuts
This damage is mainly due to exposure to sharp-edged river rocks or improper storage.
How to fix this damage: You can paint it over or cover these scratches using cool-looking stickers.
- Dents
This damage is mainly due to improper long-term storage or prolonged exposure to sunlight/heat.
How to fix this damage: You can place a heavy item as a counterweight so that this can help to realign the dent back to its original position.
COMMON ‘STRUCTURAL’ DAMAGE ON YOUR KAYAK
If you happen to see these kinds of damage on your kayak, it’s best that you quickly repair it as this can significantly affect your kayak’s performance.
This damage is mainly due to long-term storage (more than 10 years) and exposure to extreme outdoor weather.
- Holes (small/large holes)
This damage is mainly due to either accidental puncture from sharp items or even hard collision with rocky terrain.
How to fix these damages:
if you happen to have a small hole on your kayak, use these items:
- Adhesive patch (apply on top of the small hole)
- Sealant Marine Goop (Insert goop filler in between the small holes)

Recommended time: You should wait at least 6-8 hours for these materials to fully dry when you apply them.
If you happen to have a large hole/ cracks on your kayak, use these techniques:
- Rotomold Repair (basically fixing your kayak using heat)
- Fiberglass Repair (similar application as marine goop)
Recommended time: You should wait at least 1-3 days for these materials to dry thoroughly.
Ultimately, these are the quick tips on how to identify and fix these leakage spots in your kayak.
Methods To Keep Water Out Based On Types Of Kayak
There are various ways on how to keep water out of your kayak but it is ideal that you bring the right tools/gear so that you can remove water efficiently.
- Sit-In Kayak: Get yourself a decent kayak spray skirt!
For sit-in kayak, it is highly recommended that you use kayak spray skirts as they help keep water out of the cockpit and keep water from getting into the boat.
There are a variety of spray skirt sizes to choose from.
So before you rush out and buy one, please make sure that you measure the cockpit of your kayak to ensure that it will fit properly.
Bonus tips on getting the right kayak spray skirt for you!
- Measure yourself and your kayak for the right fit.
* Loose fit = comfortable but may risk water leakage
* Tight fit = secure from water leakage but can be hard to wear/remove
- Be familiar with the material
* Usually comes in neoprene or nylon
- Try to find those that come with shoulder straps or pockets for extra convenience.
- Sit-On-Top Kayak: Get yourself a scupper plug!

Nearly all sit-on-top kayaks have scupper holes built as part of safety measures to self-rescue kayakers by draining excess water on the kayak deck.
Scupper plugs are simply small plugs made of rubber or plastic and can fill up these scupper holes.
Why do you need a scupper plug?
Well, the plug will act as a barrier and prevent water from entering your kayak.
If you’re not sure how to install a scupper plug, then check out this video (plus, it’s very beginner-friendly!)
I think it’s good that you also check out this kayak safety checklist which covers nearly all essential safety tips that can help save your life during your kayak session.
FAQs

Where Is The Drain Plug On A Kayak?
It is usually located underneath a kayak or located at the back of the kayak, as drain plugs are usually located on the bottom of the kayak at its lowest point so that it is easier and faster to drain water. Nonetheless, if you still can’t find it, here’s a video to help you (hopefully, that helps).
Can You Add A Drain Plug To A Kayak?
Yes, absolutely. All you have to do is drill at least a 1-inch hole at your desired location on your kayak. Once you have drilled that 1-inch hole, you can insert the drain plug until it fits tightly so that there will be no water entering your kayak.
Conclusion
Hooray! Now you know how to get water out of a kayak!
You can also check out my other article on “Do Kayaks Tip-Over Easily,” where I cover in detail various methods on how to self-rescue and even how to get out of a kayak in deep water.
If you find this article helpful, please do share my article with your partner, family, or friends who are also new to kayaking so that they too can save the trouble during their kayak session.

![Can You Paint a Kayak? Step by Step Guide [2023]](https://womenwanderingbeyond.com/wp-content/uploads/2022/09/can-you-paint-a-kayak-9-768x512.jpg)


